If you’re looking to experience the latest features of macOS Tahoe on a non-Apple machine, this guide is for you. We’ll walk you through everything required to install macOS Tahoe on VMware, from prerequisites and downloads to VM configuration and final tweaks. The method works for both AMD and Intel processors.
⚠️ Disclaimer: This guide is for educational purposes only. Ensure you comply with Apple’s software license agreement.
Prepare Your System
Make sure:
- Virtualization is enabled in your system BIOS (Intel VT-x or AMD-V).
- Your PC has at least 8GB RAM (more is better).
- You’re using VMware Workstation Pro 17.6.4 (free to use now).
Checkout our another article on Enable Virtualization Technology on HP Lenovo Dell Asus Acer Systems.
Essential Downloads
- VMware Workstation Pro 17.6.4: Download
- VMware Unlocker Patch: Get it here
- Tahoe 26.0 (Google Drive) : Download | Tahoe 26.0 (Mediafire) : Download
- VMware Tools ISO: Download
- Download the Right OpenCore Boot Image (VMDK)
- For Intel Processors:
- OpenCore Boot Disk (VMDK) For AMD Processors:
Note: Each OpenCore Boot Disk (VMDK) includes OpenCore 1.0.5 on an EFI partition. It must be used on SATA 0:0 in VMware settings.
Install VMware and Unlock macOS Option
- Install VMware: Install VMware Workstation.
- Close VMware: Close it once installed.
- Unlock VMware for macOS:
- Extract Unlocker files into a folder.
- Run
Unlocker.exewith administrator rights. This step enables the “Apple Mac OS X” option in OS choices.
Step-by-Step Installation Process
Let’s detail the steps to install macOS Tahoe on VMware using the OpenCore method:
1. Create Your Virtual Machine
- Open VMware Workstation.
- Select “Create a New Virtual Machine” > Use Typical settings.
- Choose “I will install the operating system later.”
- Pick “Apple Mac OS X” and version “macOS 26”.
- Set a name and storage location.
- Allocate disk space (80GB or more is ideal).
- Finish the wizard.
2. Customize Virtual Machine Settings
Key Configuration Details:
- RAM: Set to at least 8GB.
- CPU Cores:
- Intel: Use half of your system’s available cores.
- AMD: Match the core count with the OpenCore image downloaded.
- Modify the Hard Disk: The virtual disk was created during the New Virtual Machine Wizard. Simply change its virtual device node from SATA 0:0 to SATA 0:3. This is the disk where you’ll install macOS Tahoe .
- Add the OpenCore Bootloader Disk:
- Add a New Virtual Disk.
- Select the option to use an existing virtual disk.
- Browse and select the OpenCore VMDK file (ensure it matches your system’s CPU & how much core you assigned).
- If prompted during the addition, choose “Keep existing format.”
- Finally, set its Virtual Device Node to SATA 0:0.
- CD/DVD Drive: Attach Tahoe ISO.
- USB Controller: Choose version 3.1.
- Network: Set to NAT or Bridged (for internet access).
Note: This method uses OpenCore EFI image to boot and install the macOS Tahoe, So, You do not need to edit the .vmx file manually.
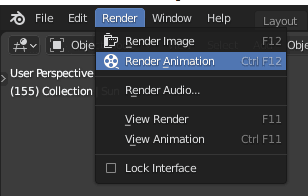
3. Begin macOS Tahoe Installation
- Start the virtual machine.
- Choose Language.
- Open Disk Utility from the macOS installer.
- Use Disk Utility to erase only the second disk (not the OpenCore one) .
- Click Erase. Name it (e.g., “macOS26”), choose Format: APFS, Scheme: GUID Partition Map. Erase the disk.
- Close Disk Utility.
- Select Install macOS Tahoe .
- Choose the “macOS26” drive you just erased.
- Follow the installer prompts. The VM will restart multiple times. Let OpenCore boot again and select the “Boot macOS Install from macOS26” or similar option each time until the installation is complete.
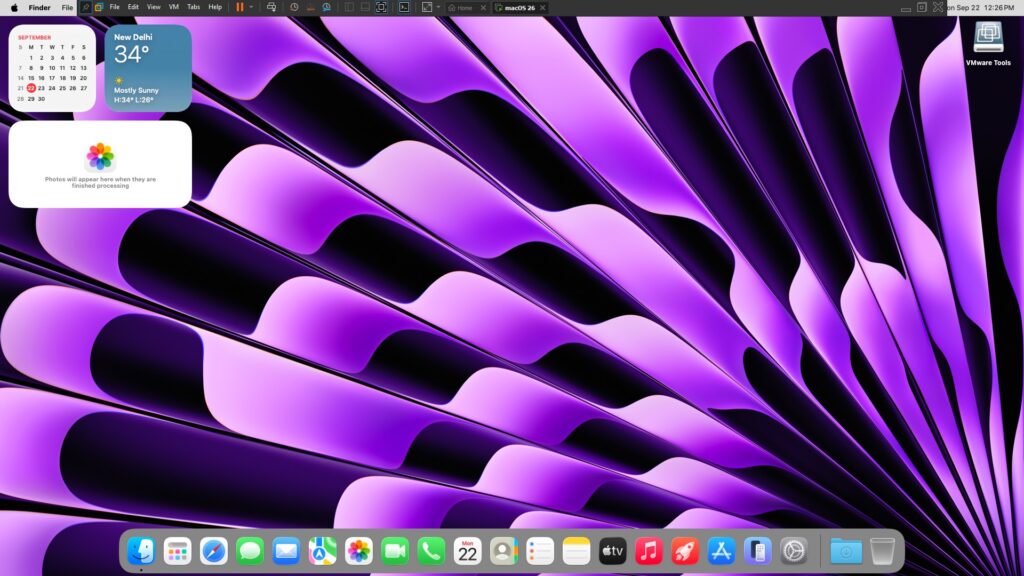
- After the final restart, you’ll reach the macOS Setup Assistant. Complete the initial configuration (country, account, etc.). Proceed with installation and follow the on-screen instructions.
Curious about macOS Sonoma? Don’t miss our full step-by-step guide to install macOS Sonoma on VMware – perfect for AMD and Intel users! Click here to explore it now →
4. Final Adjustments & VMware Tools Installation
Manual VMware Tools Installation for macOS:
New VMware versions don’t allow automatic VMware Tools install. Here’s how to do it manually:
- Download the
darwin.iso(VMware Tools) from VMware’s official site. - Mount it as a CD/DVD in your VM settings.
- Start the macOS VM and open the mounted disk.
- Launch the installer.
- macOS will block it—go to System Settings > Security & Privacy, then click Allow.
- Complete the installation and reboot the VM.
Troubleshooting Tips
- Boot stuck or loop issues (Disable Windows Hypervisor): Open Command Prompt as Administrator and run –
bcdedit /set hypervisorlaunchtype off
reg add "HKLM\SYSTEM\CurrentControlSet\Control\DeviceGuard\Scenarios\HypervisorEnforcedCodeIntegrity" /v "Enabled" /t REG_DWORD /d 0 /f- macOS doesn’t see install disk: Only format the second disk.
- Wallpaper issue (white background): Go to Settings > Wallpaper and disable “Show as screen saver.” Still white background issue not gone, then download the wallpaper from internet and set it as desktop background.
Conclusion
You’ve now learned how to install macOS Tahoe on VMware on any AMD or Intel computer. With proper files, configurations, and a little patience, you can enjoy a full macOS experience right on your Windows machine.
This setup is ideal for testing apps, exploring Apple’s OS, or using macOS without needing a Mac. Don’t forget to share this guide with anyone interested in macOS virtualization!