Chatbots like ChatGPT have become very popular. They can answer questions, help with writing, and even generate ideas. The good news is, you can build your own chatbot that works like ChatGPT.
In this guide, I will show you step by step how to build a custom ChatGPT with Python, Groq API, and Streamlit. We will also make a web interface that looks simple but works smoothly.
By the end of this article, you will have your own chatbot that:
- Saves chat history.
- Shows past conversations in a sidebar.
- Creates smart titles for each chat.
- Works just like ChatGPT with a typing effect.
Prerequisites
Before you begin building your own ChatGPT-like chatbot with Python, Streamlit, and Groq API, make sure you have the following ready:
- Basic Knowledge
- Familiarity with Python basics (functions, packages, and running scripts).
- Understanding of how virtual environments work (to isolate dependencies).
- Installed Software
- Python 3.9+ (recommended 3.10 or later).
- pip (comes with Python by default).
- Virtual Environment Tool (such as
venv, already built into Python). - Streamlit (will be installed later via pip).
- Groq API Key
- Sign up at Groq Console
- Generate your API key.
- Store it safely; you’ll add it to a
.envfile in the project.
- Code Editor & Terminal
- A text editor like VS Code, Sublime Text, or PyCharm.
- Access to your terminal (Command Prompt, PowerShell, or Linux/macOS terminal).
- Browser
- A modern browser (Chrome, Firefox, or Edge) to view the chatbot web interface.
Step 1: Setting Up Your Project Folder
Before writing any code, let’s organize our project. Keeping things simple will make it easier to follow along.
- Create a new folder on your computer. You can name it something simple like
chatbot. - Open the folder in VS Code (or any editor you prefer). This will be your workspace.
Create the Required Files
Inside this folder, we need just one file to start:
app.py→ This will contain all of our chatbot code.
Your folder structure should look like this:
chatbot/
├── app.py
That’s it for setup — simple and clean. Now your project is ready for the next step.
Step 2: Create a Python Virtual Environment
It is a good idea to use a virtual environment. This way, your chatbot project will not conflict with other Python projects on your computer.
On macOS / Linux:
python -m venv .venv
source .venv/bin/activateOn Windows:
python -m venv .venv
.venv\Scripts\activateOnce activated, you should see (.venv) in your terminal prompt.
Step 3: Install Required Libraries
First, make sure you have Python 3.9+ installed. Then install the libraries we need:
pip install streamlit groq- Streamlit: Helps us create the web interface.
- Groq: This is the API library for Groq models (like Llama 3).
Step 4: Get a Groq API Key
- Go to Groq Console.
- Create an account (free to start).
- Generate an API key.
- Save it in your system environment variables as:
For macOS / Linux:
export GROQ_API_KEY="your_api_key_here"For Windows:
$env:GROQ_API_KEY="your_groq_api_key"If you’re interested in exploring another approach, check out our guide on how to build a Python chatbot with Gemini API and chat history.
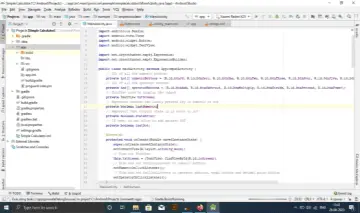
Step 5: Build the Chat App (app.py)
Now it’s time to create the main app. Below is the full code for app.py. Copy this first — then I’ll explain each part in simple words so you understand exactly what’s happening.
import os
import json
import streamlit as st
from groq import Groq

# ---------------- CONFIG ----------------
API_KEY = os.getenv("GROQ_API_KEY")
if not API_KEY:
    st.error("GROQ_API_KEY not set. Please set env var GROQ_API_KEY.")
    st.stop()

client = Groq(api_key=API_KEY)
MODEL = os.getenv("GROQ_MODEL", "llama-3.3-70b-versatile")

HISTORY_FILE = "chat_history.json"


# ---------------- PERSISTENCE ----------------
def save_history():
    with open(HISTORY_FILE, "w", encoding="utf-8") as f:
        json.dump({
            "conversations": st.session_state.conversations,
            "counter": st.session_state.counter,
            "current_conv": st.session_state.current_conv
        }, f, indent=2, ensure_ascii=False)


def load_history():
    if os.path.exists(HISTORY_FILE):
        with open(HISTORY_FILE, "r", encoding="utf-8") as f:
            data = json.load(f)
            st.session_state.conversations = data.get("conversations", {})
            st.session_state.counter = data.get("counter", 0)
            st.session_state.current_conv = data.get("current_conv", None)


# ---------------- STATE ----------------
if "conversations" not in st.session_state:
    st.session_state.conversations = {}
if "counter" not in st.session_state:
    st.session_state.counter = 0
if "current_conv" not in st.session_state:
    st.session_state.current_conv = None

# Load existing history from file
load_history()


def new_chat():
    cid = f"conv-{st.session_state.counter}"
    st.session_state.counter += 1
    st.session_state.conversations[cid] = {"title": None, "messages": []}
    st.session_state.current_conv = cid
    save_history()


def get_current():
    cid = st.session_state.current_conv
    if cid is None:
        return None
    return st.session_state.conversations.get(cid)


def derive_title(text: str) -> str:
    words = text.strip().split()
    title = " ".join(words[:8])
    return title + ("…" if len(words) > 8 else "")


# ---------------- FIRST CHAT AUTO ----------------
if not st.session_state.conversations:
    new_chat()
if st.session_state.current_conv is None and st.session_state.conversations:
    last_key = list(st.session_state.conversations.keys())[-1]
    st.session_state.current_conv = last_key

# ---------------- SIDEBAR ----------------
with st.sidebar:
    st.button("➕ New Chat", on_click=new_chat)

    st.markdown("## Recent Chats")
    for cid, conv in st.session_state.conversations.items():
        if conv.get("title"):
            is_active = cid == st.session_state.current_conv
            label = conv["title"]
            if st.button(("➡ " if is_active else "") + label, key=f"hist-{cid}"):
                st.session_state.current_conv = cid
                save_history()

# ---------------- MAIN ----------------
conv = get_current()
st.title("💬 Personal ChatGPT")

for msg in conv["messages"]:
    with st.chat_message(msg["role"]):
        st.markdown(msg["content"])

if prompt := st.chat_input("Type your message…"):
    conv["messages"].append({"role": "user", "content": prompt})
    save_history()

    with st.chat_message("user"):
        st.markdown(prompt)

    with st.chat_message("assistant"):
        placeholder = st.empty()
        reply = ""

        try:
            stream = client.chat.completions.create(
                model=MODEL,
                messages=conv["messages"],
                stream=True,
            )

            for chunk in stream:
                delta = chunk.choices[0].delta
                if hasattr(delta, "content") and delta.content:
                    reply += delta.content
                    placeholder.markdown(reply + "▌")
            placeholder.markdown(reply)

        except Exception as e:
            placeholder.error(f"Error: {e}")
            reply = f"(error: {e})"

        conv["messages"].append({"role": "assistant", "content": reply})
        save_history()

        if not conv.get("title"):
            conv["title"] = derive_title(prompt)
            save_history()
            st.rerun()
Explained: How the Code Works
Let’s break the code into smaller parts and explain them.
- Configuration: Setting up API key and model
API_KEY = os.getenv("GROQ_API_KEY")
if not API_KEY:
    st.error("GROQ_API_KEY not set. Please set env var GROQ_API_KEY.")
    st.stop()

client = Groq(api_key=API_KEY)
MODEL = os.getenv("GROQ_MODEL", "llama-3.3-70b-versatile")This part checks if your Groq API key is available. If not, the app stops with an error message. It also sets which AI model to use (default is llama-3.3-70b-versatile).
- Saving and loading chat history
HISTORY_FILE = "chat_history.json"

def save_history():
    with open(HISTORY_FILE, "w", encoding="utf-8") as f:
        json.dump({
            "conversations": st.session_state.conversations,
            "counter": st.session_state.counter,
            "current_conv": st.session_state.current_conv
        }, f, indent=2, ensure_ascii=False)

def load_history():
    if os.path.exists(HISTORY_FILE):
        with open(HISTORY_FILE, "r", encoding="utf-8") as f:
            data = json.load(f)
            st.session_state.conversations = data.get("conversations", {})
            st.session_state.counter = data.get("counter", 0)
st.session_state.current_conv = data.get("current_conv", None)These two functions let the chatbot remember conversations even after reload.
save_history()writes the current chats, counter, and active chat to a chat_history.json file.load_history()reads that file when the app starts and restores state. This is what keeps chats after reload.
- Session state and restoring memory
if "conversations" not in st.session_state:
    st.session_state.conversations = {}
if "counter" not in st.session_state:
    st.session_state.counter = 0
if "current_conv" not in st.session_state:
    st.session_state.current_conv = None

# Load existing history from file
load_history()These lines ensure session_state keys exist, then call load_history() to restore any saved conversations. This runs on app start.
- Starting a new chat
def new_chat():
    cid = f"conv-{st.session_state.counter}"
    st.session_state.counter += 1
    st.session_state.conversations[cid] = {"title": None, "messages": []}
    st.session_state.current_conv = cid
save_history()new_chat() makes a new chat slot with a unique ID. Title is None so it stays out of sidebar until first Q/A. It sets the new chat as active and saves the updated history to disk.
- Helpers to manage conversations
def get_current():
    cid = st.session_state.current_conv
    if cid is None:
        return None
    return st.session_state.conversations.get(cid)

def derive_title(text: str) -> str:
    words = text.strip().split()
    title = " ".join(words[:8])
return title + ("…" if len(words) > 8 else "")get_current()returns the active conversation object.derive_title()makes a short smart title from the first user message so it’s easy to recognize chats in the sidebar.
- Making sure first chat is ready
if not st.session_state.conversations:
    new_chat()
if st.session_state.current_conv is None and st.session_state.conversations:
    last_key = list(st.session_state.conversations.keys())[-1]
st.session_state.current_conv = last_keyIf there are no saved chats, this creates the first hidden chat so the input box is ready. If current_conv is unset, it picks the last chat created.
- Sidebar UI: New Chat button and History list
with st.sidebar:
    st.button("➕ New Chat", on_click=new_chat)

    st.markdown("## Recent Chats")
    for cid, conv in st.session_state.conversations.items():
        if conv.get("title"):
            is_active = cid == st.session_state.current_conv
            label = conv["title"]
            if st.button(("➡ " if is_active else "") + label, key=f"hist-{cid}"):
                st.session_state.current_conv = cid
save_history()The sidebar has two parts:
- The New Chat button calls
new_chat()and immediately saves. - A history list only shows chats with a title (so empty slots stay hidden). Clicking a title opens that chat and saves the state. The current one is marked with an arrow.
- Showing messages in main window
conv = get_current()
st.title("💬 Personal ChatGPT")

for msg in conv["messages"]:
    with st.chat_message(msg["role"]):
        st.markdown(msg["content"])
conv holds the active conversation. This shows all past messages (user + assistant) in the main chat window.
- Handling user input and assistant reply
if prompt := st.chat_input("Type your message…"):
    conv["messages"].append({"role": "user", "content": prompt})
    save_history()

    with st.chat_message("user"):
        st.markdown(prompt)

    with st.chat_message("assistant"):
        placeholder = st.empty()
        reply = ""

        try:
            stream = client.chat.completions.create(
                model=MODEL,
                messages=conv["messages"],
                stream=True,
            )

            for chunk in stream:
                delta = chunk.choices[0].delta
                if hasattr(delta, "content") and delta.content:
                    reply += delta.content
                    placeholder.markdown(reply + "▌")
            placeholder.markdown(reply)

        except Exception as e:
            placeholder.error(f"Error: {e}")
            reply = f"(error: {e})"

        conv["messages"].append({"role": "assistant", "content": reply})
        save_history()

        if not conv.get("title"):
            conv["title"] = derive_title(prompt)
            save_history()
st.rerun()This is the most important part:
- When the user types and sends (
st.chat_input), we append the user message to the conversation and callsave_history()so it persists. - We show the user message immediately.
- For the assistant reply we call Groq’s streaming completions API with the whole conversation
messages. - As chunks arrive we append tokens to
replyand update the UI with a typing cursor (▌). - After streaming finishes we append the assistant message to history and save.
- If the conversation had no title (first Q/A), we derive a short title, save it, and call
st.rerun()to refresh the UI so the sidebar shows the new title right away.
Step 6: Run the Chatbot
In your terminal, run:
streamlit run app.pyThis automatically open the link in default browser but if it not then open the link shown in the terminal (usually http://localhost:8501/).
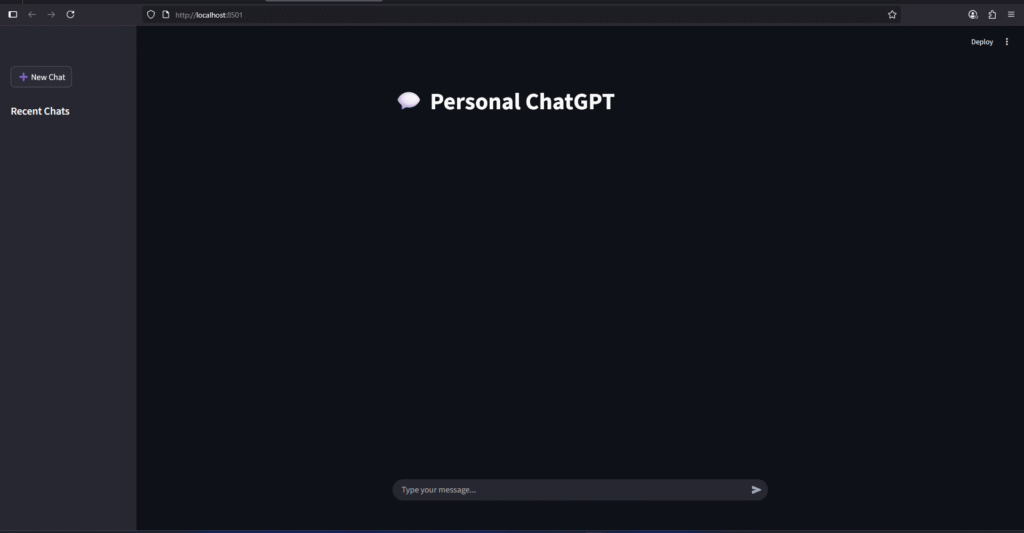
How the Chatbot Works
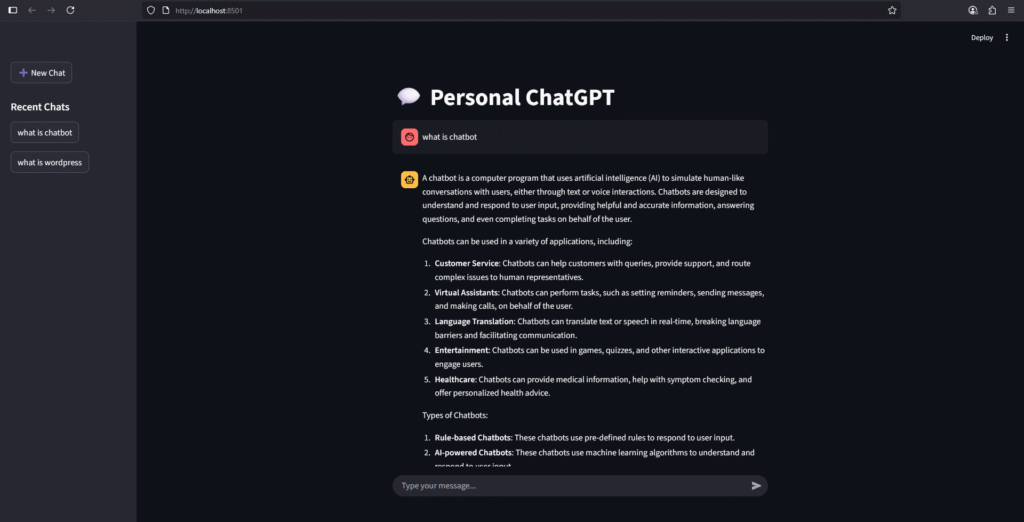
- New Chat Button: Lets you start a fresh chat.
- Sidebar History: Stores all past conversations with smart titles (only after first Q/A).
- Streaming Answer: Replies show up like ChatGPT, word by word.
- First Chat Auto-Created: You don’t need to click “New Chat” for your first chat.
- Titles Update After First Answer: A new conversation appears in history only after the first answer is shown.
- Persistent Memory: Chat history is saved in
chat_history.jsonso you don’t lose it on reload.
Conclusion
That’s it! 🎉 You now know how to build a custom ChatGPT with Python and Groq API using Streamlit, with persistent memory.
This project is simple, but you can extend it with more features:
- Save chat history to a database instead of JSON.
- Add authentication for multiple users.
- Deploy it online with Streamlit Cloud or Heroku.
With this setup, you have your own personal ChatGPT clone, which you can customize however you like.