
In the world of AI, building a Python chatbot with Gemini API is an excellent way to create sophisticated and conversational interfaces. While a basic bot is a great start, this tutorial will guide you through building a more advanced AI Chatbot that remembers past conversations and allows users to switch between them.
This tutorial will guide you through building exactly that – a powerful, multi-chat Q&A chatbot using Google’s Gemini Pro API and the Streamlit framework for the user interface. Unlike other guides, we will focus on a setup that doesn’t require Conda or complex virtual environments and provides clear, practical instructions for creating files directly in Visual Studio Code.
Prerequisites
Before we start coding, you need two simple things:
- Python Installed: Ensure Python is installed on your system. You can download it from the official Python website. During installation, make sure to check the box that says “Add Python to PATH.”
- Google Gemini API Key: This is the key to unlocking the AI’s power.
- Go to the Google AI for Developers website.
- Click on “Get API key in Google AI Studio” and follow the instructions to create your free key.
- Important: Copy this key and keep it safe.
Step 1: Setting Up Your Project Folder
First, let’s organize our project. We’ll keep it simple: one main folder containing our Python script and a file for our secret API key.
- Create a new folder for your project. Let’s call it
ai-chatbot. - Open this folder in Visual Studio Code (VS Code). This will be our workspace.
Creating Files in VS Code
Inside VS Code, you will create two files. You do not need to use touch or any command line tools; you can do it all with a simple click in VS Code.
- Create the Python App File:
- Click the “New File” icon in the VS Code file explorer.
- Name the file
app.py. This is where our main chatbot logic will go.
- Create the Environment File:
- Again, click the “New File” icon.
- Name this file
.env. The leading dot is important! - This file will store our secret API key so we don’t have to hardcode it in our script.
Your folder structure should now look like this:
ai-chatbot/
├── app.py
└── .env
Step 2: Storing Your API Key
Open the .env file you just created. Inside, write the following line, pasting your own Gemini API key where indicated.
GOOGLE_API_KEY="YOUR_API_KEY_HERE"
This keeps your key secure and separate from your main code.
Step 3: Installing the Necessary Libraries
With our project set up, we need to install the Python libraries that make everything work. Open the terminal directly within VS Code (Terminal > New Terminal) and run the following command:
pip install streamlit google-generativeai python-dotenvLet’s break down what each library does:
streamlit: The magic framework that creates our web-based user interface with just Python code.google-generativeai: The official Google library that allows our app to communicate with the Gemini API.python-dotenv: A handy utility that reads our secret API key from the.envfile.
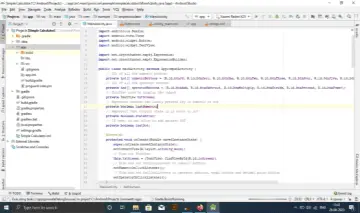
Step 4: Building Our Chatbot’s Code (app.py)
Now for the main event. Instead of pasting all the code at once, we’ll build our app.py file section by section. This makes it much easier to understand how each part contributes to the final application.
Open your empty app.py file and let’s begin.
Step 4.1: Imports and Initial Setup
First, let’s add all the necessary libraries and configure the basic page settings and API connection.
Add the following code to app.py:
# --- Section 1: Imports and Configuration ---
import streamlit as st
import os
import time
import google.generativeai as genai
from google.api_core import exceptions
from dotenv import load_dotenv

# Load environment variables from the .env file
load_dotenv()

# Configure the Streamlit page
st.set_page_config(
    page_title="Gemini Chat History 🤖",
    page_icon="📚",
    layout="centered",
    initial_sidebar_state="expanded",
)

# Configure the Gemini API with our key
try:
    genai.configure(api_key=os.getenv("GOOGLE_API_KEY"))
    MODEL_NAME = "gemini-2.0-flash"
except (AttributeError, AssertionError) as e:
    st.error("⚠️ Google API Key not found or invalid. Please set it in your .env file.")
st.stop()Explanation:
- We start by importing all the libraries we installed.
load_dotenv()reads the.envfile and makes theGOOGLE_API_KEYavailable to our script.st.set_page_config()sets the browser tab title, icon, and layout for our app.- Finally, we configure the
genailibrary with our API key. Thetry...exceptblock is crucial for error handling; it tells the user exactly what’s wrong if the key is missing or invalid.
Step 4.2: Creating the Automatic Titling Function
Next, we’ll add the helper function that creates a short title for our conversations. This is what makes our chat history so user-friendly.
Add this code right below the previous section:
# --- Section 2: Helper Function for Chat Titling ---
def get_chat_title(prompt):
    """Generates a concise title for a chat based on the initial prompt."""
    try:
        model = genai.GenerativeModel(MODEL_NAME)
        response = model.generate_content(
            f"Generate a very short, concise title (4 words max) for this user prompt: '{prompt}'"
        )
        return response.text.strip().replace("*", "")
    except Exception as e:
        # Fallback to a generic title if the API call fails
return "New Chat"Explanation:
- This is a clever helper function that makes our app feel premium.
- When a user starts a new conversation, we take their first question (
prompt) and send it to the Gemini model with a special instruction: “Generate a very short…title”. - This gives us an automatic, relevant title (e.g., “History of Roman Empire”) for the chat history list, which is much better than a generic timestamp.
Step 4.3: Initializing the App’s Memory (Session State)
Now, we need to set up Streamlit’s memory. This is crucial for remembering chats both during a session and between interactions.
Add this code below the helper function:
# --- Section 3: Session State Initialization ---
if "chat_history" not in st.session_state:
    st.session_state.chat_history = {}  # Stores all chats: {chat_id: {title: str, messages: []}}

if "active_chat_id" not in st.session_state:
st.session_state.active_chat_id = None # The ID of the currently active chatExplanation:
- Session State is Streamlit’s memory. It lets the app remember variables between user interactions.
st.session_state.chat_history: We initialize an empty dictionary to store all our conversations. The structure is designed to hold a unique ID for each chat, along with its title and list of messages.st.session_state.active_chat_id: This variable acts as a bookmark, telling our app which conversation the user is currently looking at.Nonemeans it’s a brand new chat.
Step 4.4: Building the Chat History Sidebar
With our app’s memory ready, let’s create the sidebar. This is where the user can start a new chat or load a previous one.
Add this code below the session state section:
# --- Section 4: The Sidebar for Chat History ---
with st.sidebar:
st.title("📚 Chat History")
# "New Chat" button
if st.button("➕ New Chat", use_container_width=True, type="primary"):
st.session_state.active_chat_id = None
st.rerun()
st.markdown("---")
# Display list of past chats
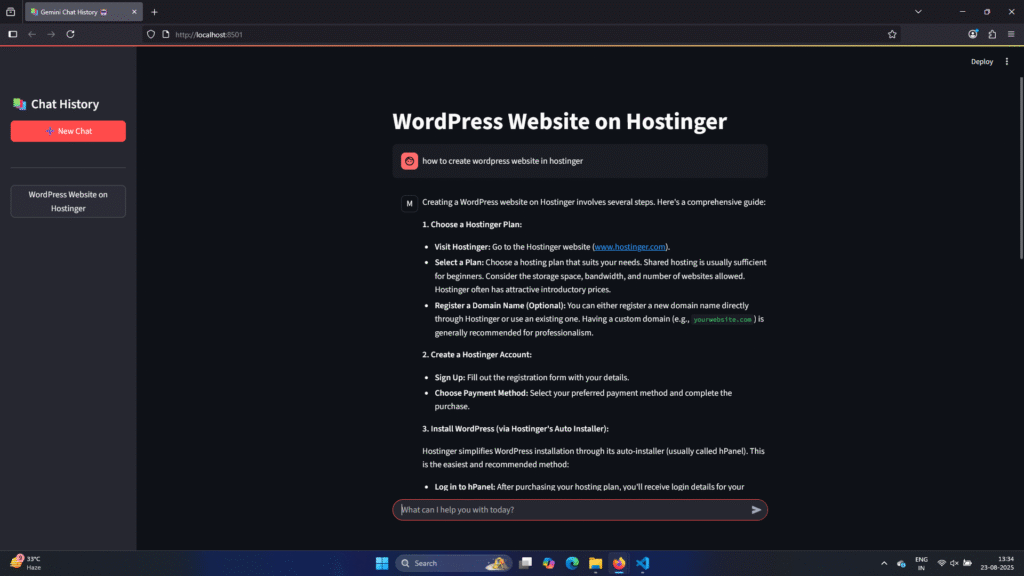
for chat_id in reversed(list(st.session_state.chat_history.keys())):
chat_title = st.session_state.chat_history[chat_id]["title"]
if st.button(chat_title, key=f"chat_{chat_id}", use_container_width=True):
st.session_state.active_chat_id = chat_id
st.rerun()Explanation:
with st.sidebar:places all the elements within it onto the left-hand sidebar.- The New Chat button simply resets the
active_chat_idtoNoneand callsst.rerun()to refresh the app into a clean state. - The
forloop iterates through our savedchat_history. For each saved chat, it creates a button with the chat’s title. - When a user clicks on a history button, we set the
active_chat_idto the ID of that chat andrerunthe app to load it.
Step 4.5: Creating the Main Chat Interface
Now, let’s code the main part of our app where the conversation appears. This section will read from our session state to display the correct conversation.
Add this code below the sidebar section:
# --- Section 5: The Main Chat Interface ---
# Determine the messages for the active chat
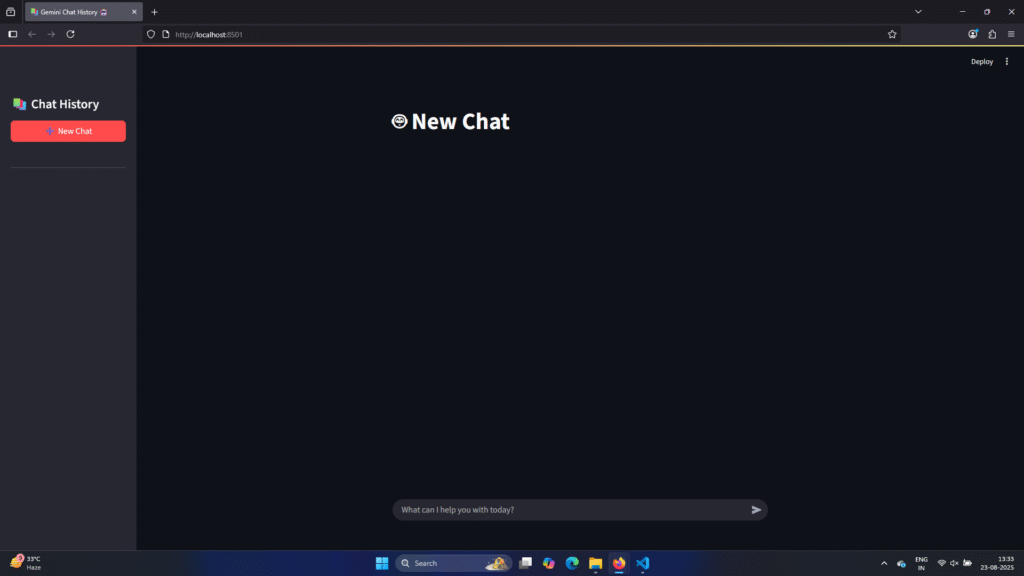
if st.session_state.active_chat_id is None:
active_chat_messages = []
st.title("🤖 New Chat")
else:
active_chat_messages = st.session_state.chat_history[st.session_state.active_chat_id]["messages"]
st.title(st.session_state.chat_history[st.session_state.active_chat_id]["title"])
# Initialize the Gemini chat object with the correct history
model = genai.GenerativeModel(MODEL_NAME)
chat = model.start_chat(history=active_chat_messages)
# Display chat messages for the active chat
for message in chat.history:
with st.chat_message(message.role):
st.markdown(message.parts[0].text)Explanation:
- This logic determines what to display in the main window. If
active_chat_idisNone, it’s a new chat. Otherwise, it retrieves the message history for the active chat from ourchat_historydictionary. - Crucially,
model.start_chat(history=active_chat_messages)initializes the Gemini model with the context of the entire loaded conversation. This is how the AI “remembers” what you were talking about. - The final loop displays all the messages for the currently active conversation.
Step 4.6: Handling User Input and API Calls
Finally, let’s add the logic that captures the user’s input, gets a response from the Gemini API, and saves the new messages.
Add this final piece of code at the end of your app.py file:
# --- Section 6: Handling User Input ---
if prompt := st.chat_input("What can I help you with today?"):
    # If this is the first message in a new chat, create the chat entry
    if st.session_state.active_chat_id is None:
        new_chat_id = str(time.time()) # Generate a unique ID
        st.session_state.active_chat_id = new_chat_id
        new_title = get_chat_title(prompt)
        st.session_state.chat_history[new_chat_id] = {"title": new_title, "messages": []}

    # Display user's message
    with st.chat_message("user"):
        st.markdown(prompt)

    # Send message to Gemini and get response
    try:
        response = chat.send_message(prompt)
        with st.chat_message("model"):
            st.markdown(response.text)
    except Exception as e:
        st.error(f"An error occurred: {e}")

    # Update the official history in session state and rerun
    st.session_state.chat_history[st.session_state.active_chat_id]["messages"] = chat.history
st.rerun()Explanation:
st.chat_input()creates the text box at the bottom of the screen and waits for the user to send a message.- If it’s a new chat, we generate a unique ID (using the current timestamp), call our
get_chat_titlefunction, and create a new entry in ourchat_historydictionary. - We display the user’s prompt and then call
chat.send_message(prompt)to get the AI’s response. - Finally, and most importantly, we save the updated conversation history (
chat.history) back into our mainst.session_state.chat_historydictionary andrerunthe app to display the new messages and update the sidebar.
Step 5: Running Your Chatbot
You’re all set! To bring your chatbot to life, go back to your VS Code terminal and run this simple command:
streamlit run app.pyYour web browser will automatically open a new tab with your fully functional, multi-chat AI Chatbot application. Enjoy your creation!


Thanks for sharing. Can you advise how this can be expanded with custom training data?
Thanks for the kind words! That’s a really great question.
Training with custom data is such an important topic that I think it deserves its own dedicated post. I’m going to work on a follow-up article that walks through everything from preparing the data to training and evaluating the model.
Thanks for the great idea! I’ll drop a link here once it’s published.